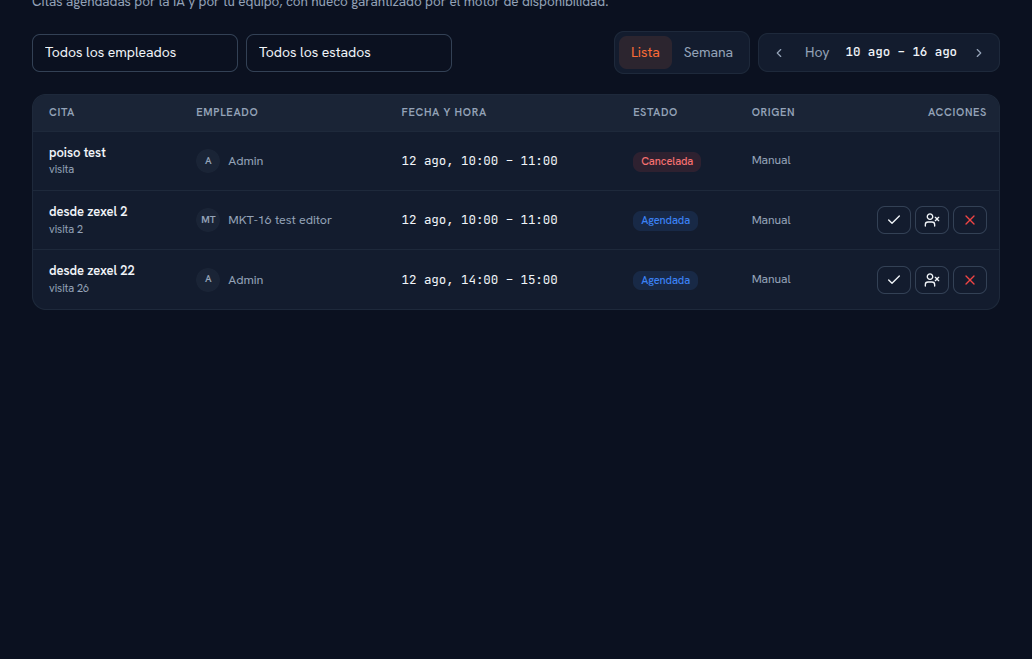
It shows all of your agency’s appointments, with two filters at the top — by employee (“All employees”) and by status (“All statuses”) — and a selector to switch between the List view and the Week view. To the right of that selector, a date navigator (“Today”, with ‹ › arrows on the sides) moves the visible range.
In the List view, each row of the table is an appointment with these columns:
- Appointment: the title you (or the AI) gave it and, below in gray, its type (for example, “visit”).
- Employee: the avatar and name of the person it’s assigned to.
- Date and time: the day and time range of the appointment.
- Status: a colored chip with one of four values — Scheduled, Completed, Cancelled or No-show.
- Source: Manual if someone on your team created it, or AI if the agent scheduled it during a conversation.
- Actions: on appointments still in progress (Scheduled), three icons to change their status — see the detail in section 5. On an already closed appointment (Cancelled, Completed or No-show) there are no further actions available.
The Week view offers the same information laid out in a weekly grid, useful for seeing each employee’s already-booked slots at a glance.