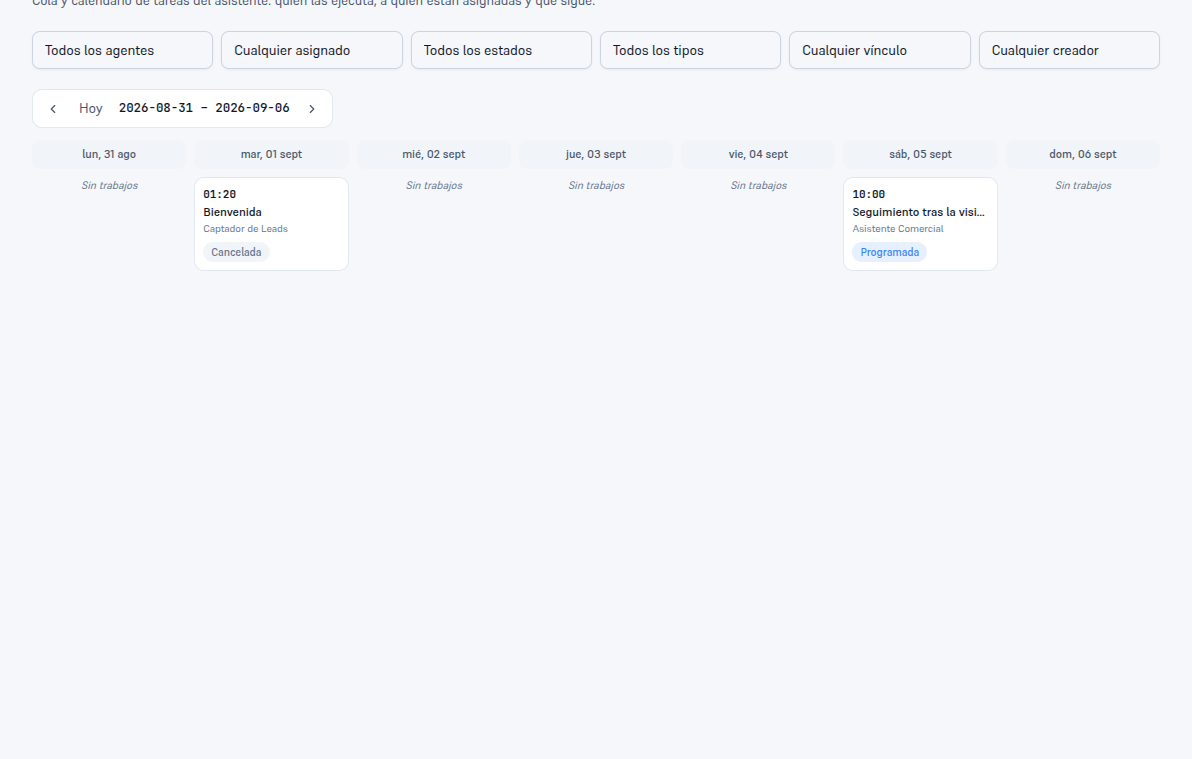
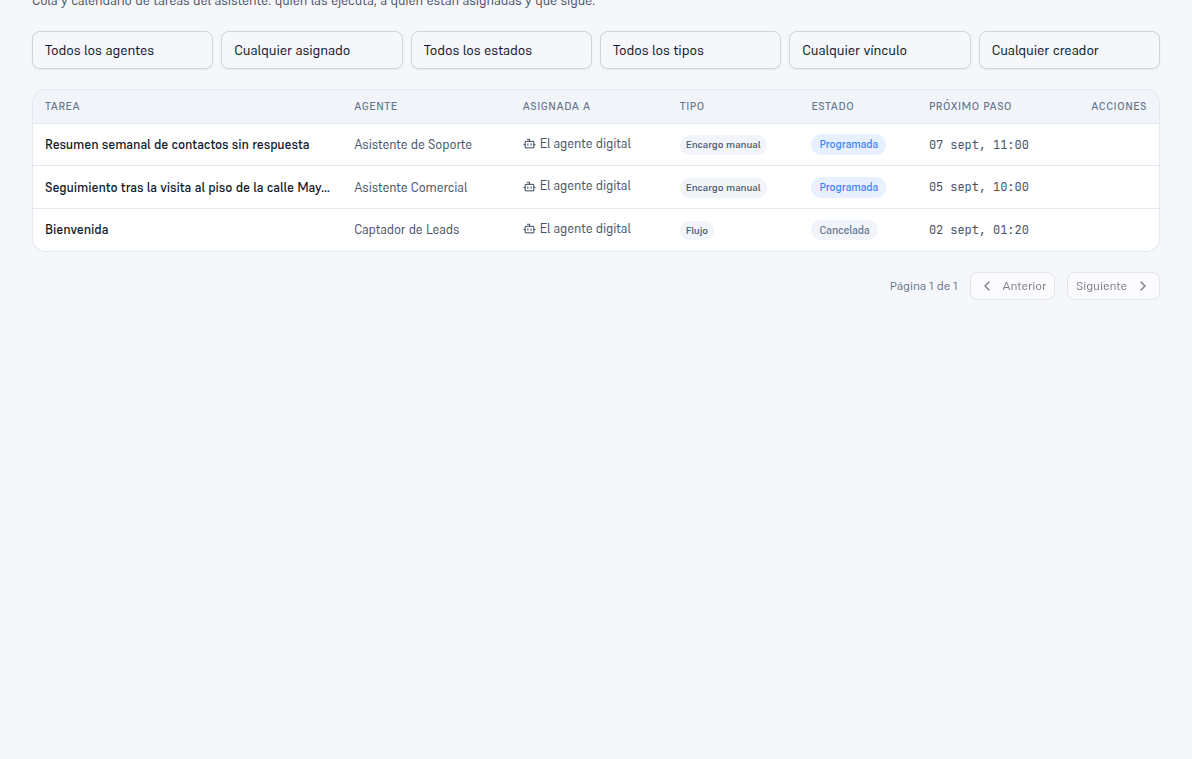
Go into Jobs, in the sidebar. The screen has two views — Queue and Calendar — over the same set of tasks, with the same filters at the top: by agent, by who it’s assigned to, by status, by type, by link (internal, lead, conversation or contact), and by who created it.
2.1 A task’s statuses
Section titled “2.1 A task’s statuses”| Status | Meaning |
|---|---|
| Suggestion | The assistant proposed the task on its own (for example, it committed to something with a customer) and is waiting for you to confirm or reject it. |
| Scheduled | It has a date, recurrence, event or condition set; its turn hasn’t come up yet. |
| Active | Its turn has come up and it’s running right now. |
| Waiting for approval | It needs someone on the team to approve it before continuing. |
| Completed | It finished successfully. |
| Failed | It finished with a problem. |
| Overdue | It had a deadline and it passed without being resolved. |
| Cancelled | Someone cancelled it by hand. |
A task’s type tells you where it came from: Manual assignment (someone on the team created it from this same form), Assistant’s promise (the assistant committed to something in a conversation), Recurring (a fixed schedule), or Flow (it’s a step of a flow — section 3).
2.2 Creating a task by hand
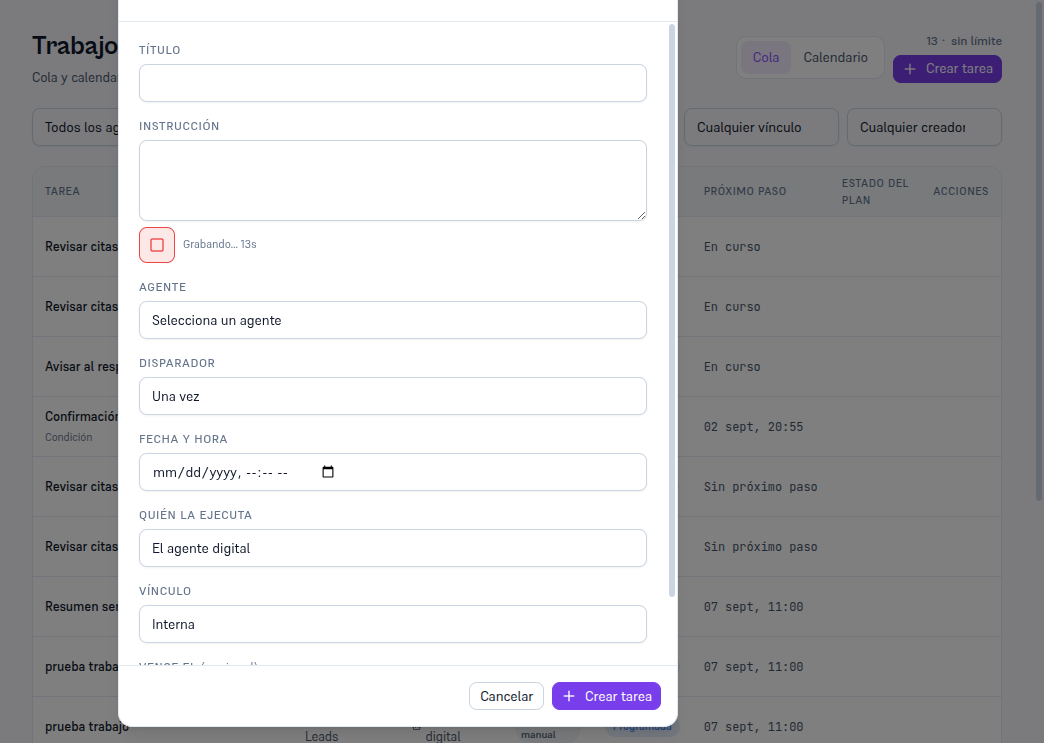
Section titled “2.2 Creating a task by hand”Requirements: Admin or Editor role.
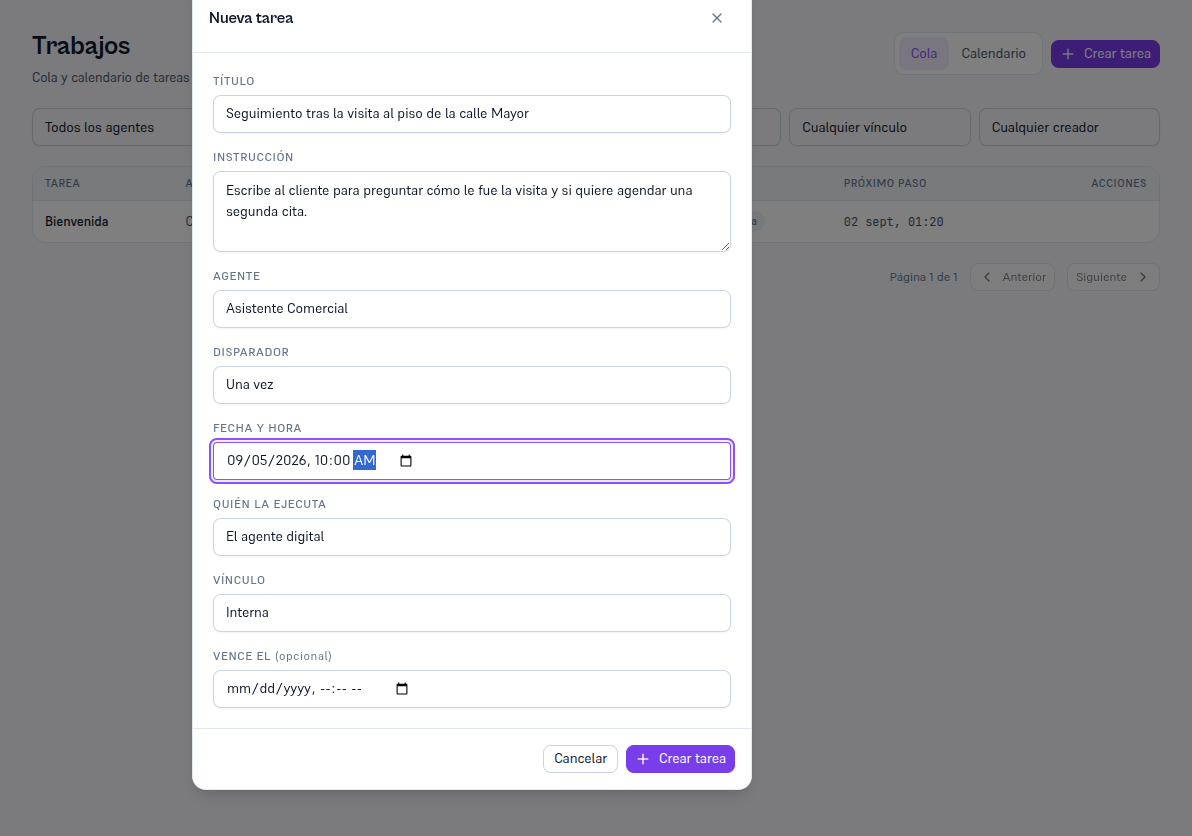
- Tap “Create task”, at the top right.
- Type the title and the instruction — in your own words, as if you were explaining it to someone on the team. Next to the field, the “Dictate by voice” button (microphone icon) lets you say it instead of typing it — see the note below.
- Choose the agent that’s going to run it.
- Choose the trigger: once (date and time), recurring (a frequency from an already-ready list: every day, every Monday…), by event (when a new contact comes in or moves stage), or condition.
- Choose who runs it: the digital agent, or a specific operator on your team.
- Choose the link: internal (no associated contact), lead, or contact.
- Tap “Create task”.
Note — Dictating the instruction instead of typing it
Press the microphone next to the “Instruction” field and speak — up to 60 seconds. While recording you see a timer (“Recording… N s”) and can stop it whenever you want; once you release it, a “Transcribing…” notice precedes the text, which appears LITERALLY in the field — it never saves on its own. You read it, edit it if needed, and tap “Create task” yourself, just like with any hand-typed instruction. If your browser has no microphone or doesn’t allow it, the button disappears (“Voice dictation not available in this browser”) without blocking the rest of the form; if the dictation service doesn’t respond, an honest notice tells you so instead of simulating a transcription.
Note — A condition can be checked in two ways
“When an event occurs” is free: it fires the exact instant something happens (a lead is created, it changes stage), without spending AI budget. “When the assistant evaluates it” has a cost: the assistant reviews the condition every so often using AI, until it’s met or the deadline passes — reserve it for what a machine can’t decide on its own (“check whether the customer seems interested”).
2.3 A task’s record
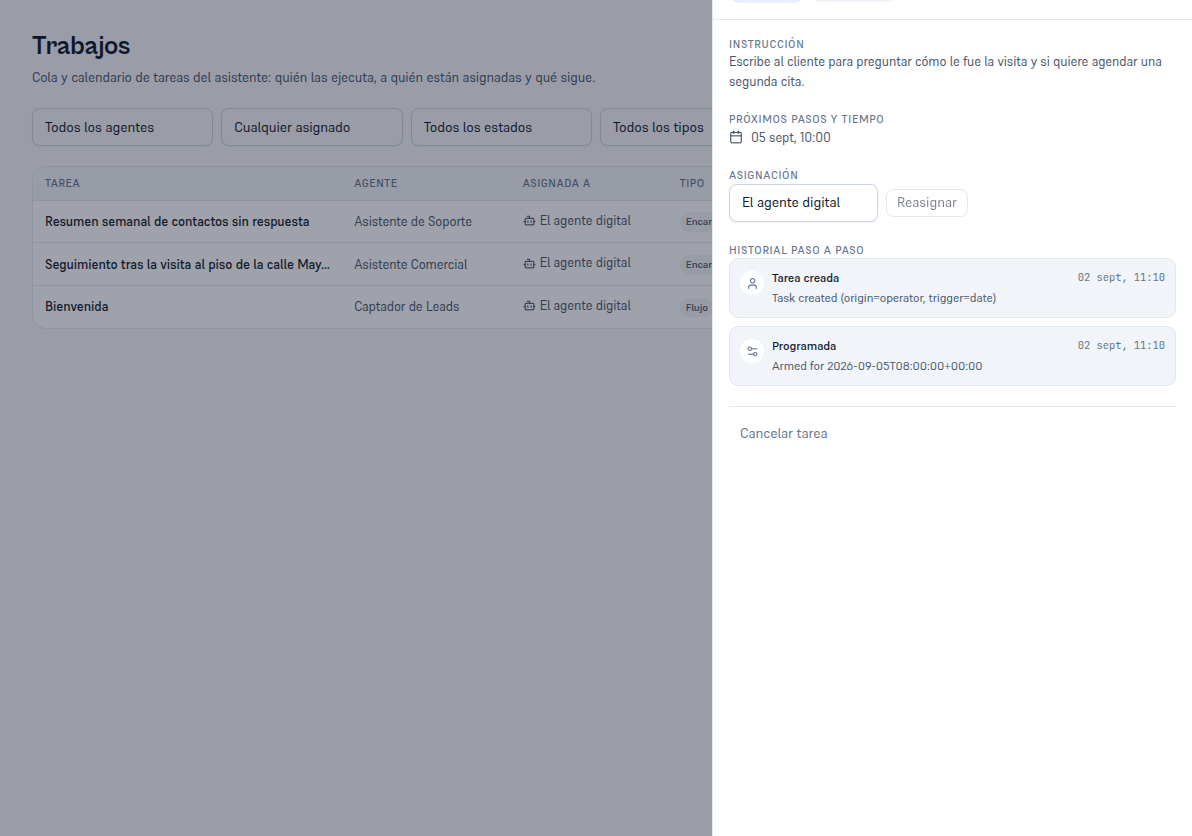
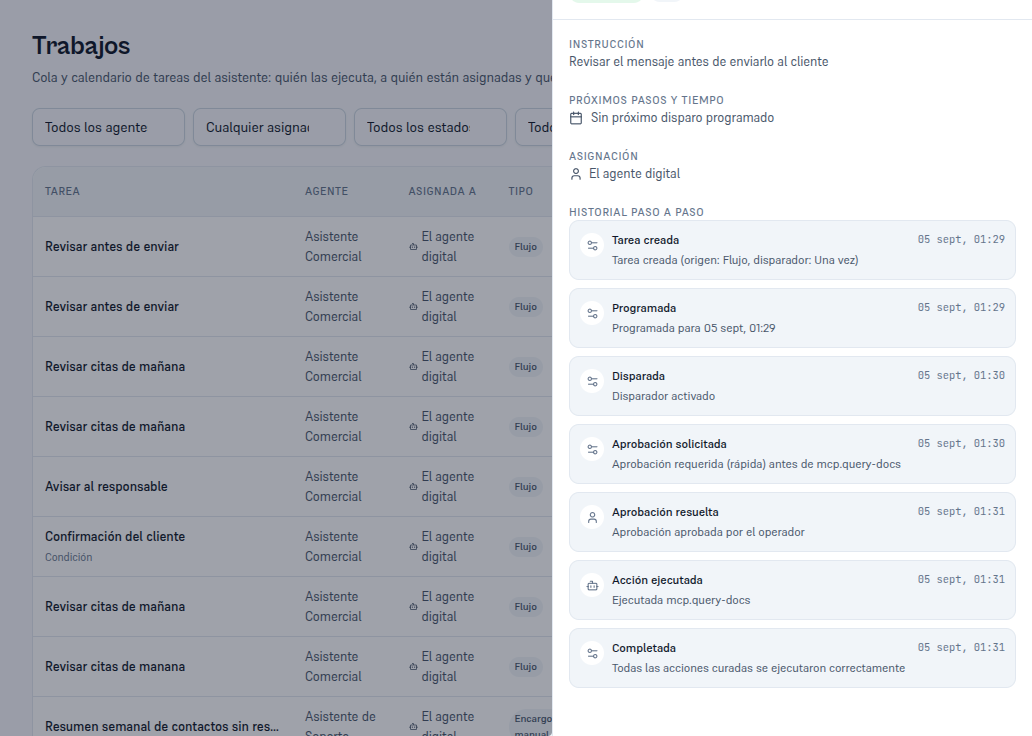
Section titled “2.3 A task’s record”Tap any row in the queue (or a task on the calendar) to open its record. You’ll find:
- Instruction: what was asked of the agent, in plain language.
- Next steps and timing: when the next step will fire (or fired).
- Assignment: who it’s currently assigned to, with the option to reassign it — to the digital agent or to an operator, in either direction.
- Step-by-step history: every event in its life (created, scheduled, fired, run, approved, completed…) with the exact date and time.
2.4 The calendar
Section titled “2.4 The calendar”Tap the “Calendar” tab to see the same queue in a weekly layout. Navigate week by week with the arrows or jump back to “Today”. Your Calendar’s appointments show up here too, read-only, so you have everything scheduled at a glance — the assistant’s jobs and human appointments together.
2.5 Approving a task
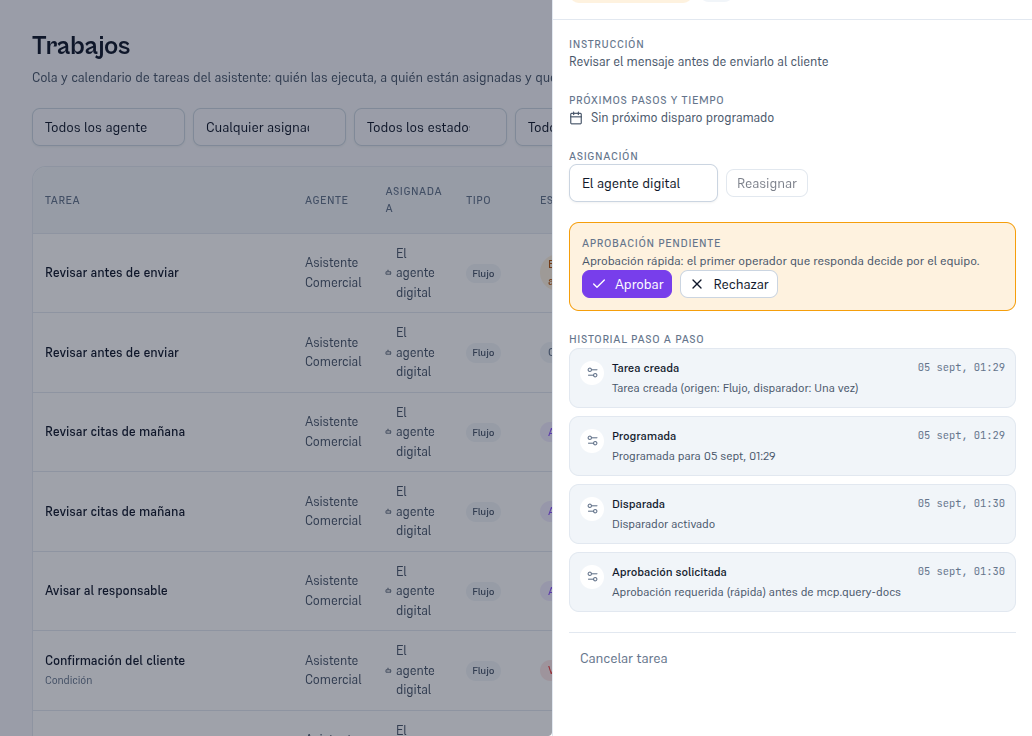
Section titled “2.5 Approving a task”A step can be marked “requires approval” — in its own Approval field, or by picking the Approval → “Request approval” piece in a flow’s visual editor (section 3). When the trigger reaches that step, instead of running its action directly, the task moves to “Waiting for approval” status and shows the Approve and Reject buttons, both on the queue row itself and on its own record.
Any operator with access approves or rejects it, from the row or from the record — it doesn’t have to be whoever created it or whoever it’s assigned to. If approved, the action actually runs and the task moves to “Completed”, with its full step-by-step history: created, scheduled, triggered, approval requested, approval resolved (with who approved it), action executed and completed.
Note — A step with no action attached never reaches “Waiting for approval”
Approval gates a specific curated action (a message, a spreadsheet row, a tool from an MCP server…). A step with no action attached has nothing to approve: it stays “Active”, waiting for someone to complete it by hand with closing notes (section 2.3).
2.6 Approving item by item (flows with repetition)
Section titled “2.6 Approving item by item (flows with repetition)”When the task requiring approval is a step inside a flow with “Repeat for each item” (section 3.7) — for example, reviewing a low-confidence invoice inside the “Invoices by email” template, Manual 61 — the Jobs screen groups them differently: instead of a table of loose rows, you’ll see an approval queue grouped by run, with one header per flow (“‹flow name› · N pending”) and, underneath, one row per item with its own identifier, the specific step, and the reason.
The reason for each row is always one of these two, never free text:
| Reason | What it means |
|---|---|
| Low confidence | An earlier step for THIS item extracted or validated a piece of data with little certainty (for example, a hard-to-read invoice). The row shows the exact confidence figure and the threshold it needed to clear — never just “low confidence” with no numbers. |
| Approval required by the flow | The step is marked “requires approval” unconditionally: it always stops for review, whatever the confidence. |
A “View run” link in the group header takes you to that run’s own record (section 3.8) to see the rest of its items at a glance. Approving or rejecting one row never affects the others in the same group — each item has its own task, its own history and its own decision, exactly like any two loose tasks.
Note — It may ask you to approve more than once for the same item
When the step that writes performs several actions in a row (for example, “Log to sheet + Upload to folder + Mark as processed”, the “Invoices by email” template in Manual 61), it’s normal to be asked to approve once per remaining action for that specific item — keep approving until the item reaches “Done”, it’s not an error or a duplicate approval.